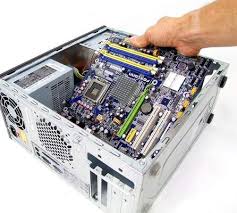
As we know motherboard is one of the most significant component of PC, i.e. backbone , provides a base there because as all of components plug into it, without it you must seems like a WOW! This post mainly written for those people who are suppose to be none in this field so, you must read step by step guidance with full concentration because in case if you just skip one step, it must go death so guys keep in your all that given point.

How to Install motherboard in PC? Step By Step Guidance
Step 1:
First, you have to need to open your PC case after that remove both side panels and motherboard tray form it so, it makes easy in installation.
Step 2:
Ground it so, it can’t give you any shock while installation.
Step 3:
After that, as motherboard comes with 2 main screws fitted it carefully with that screws. However, if you are upgrading your PC to high class so, you have reinstall each part of your computer without it can’t work and if build a brand new PC than you don’t any kind of reinstalltion.
Step 4:
Replace the I/O panel shield, this part is difficult. To remove it apply enough pressure to each four corners, make sure that the actual layout of the connectors on the motherboard so, it is going in the right way.
Step 5:
Now find out the standoffs (that keeps your motherboard much above form case). Its main work is to prevent from short circuit and helps in cooling, fix your motherboard in it. Make sure not excessively tighten the screws.
Step 6:
Main step, you have to install each main component of your PC.
Step 7:
Now, fix the side panels of the case to their original positions and screw it back in.
Step 8:
Final step, open up your PC and install the windows according to your wish.
Done congrats! you have installed your motherboard.


